Behind every reliable wine cellar is solid construction and proper insulation. These foundational elements protect your investment by creating a stable thermal envelope that allows your cooling system to work efficiently.
At Wine Cooling Pro, we guide homeowners, contractors, and designers through the essential steps to construct wine rooms that are airtight, energy-efficient, and built to preserve wine for decades.
Why Construction Quality Matters
Wine cellars aren’t just storage—they’re controlled environments. Without the proper materials and sealing methods, even the best cooling unit will struggle to maintain ideal conditions.
Benefits of Proper Construction:
- Maintains consistent temperature and humidity
- Reduces energy consumption and operating costs
- Prevents condensation, mold, and structural damage
- Extends the life of your cooling system
From insulation to framing, every detail counts when it comes to keeping your cellar sealed and climate-ready.
Framing & Vapor Barriers
Framing Guidelines:
Use standard 2″ × 4″ or 2″ × 6″ wall studs depending on insulation depth
- Ceiling joists must accommodate insulation (R-30 recommended)
- Pressure-treated materials are recommended for any contact with concrete
Vapor Barrier Installation:
- Install a 6-mil polyethylene sheet on the warm side of the cellar (i.e., facing outward)
- Vapor barriers are essential in preventing warm, moist air from entering the cellar and condensing
- Overlap seams by at least 6 inches and seal with vapor tape
Insulation: What You Need to Know
Proper insulation is the backbone of an energy-efficient wine cellar. It minimizes thermal exchange and helps maintain stable temperatures year-round.
Recommended Insulation Ratings:
- Walls: Minimum R-20
- Ceilings: Minimum R-20 to R-30
- Floors (if applicable): Rigid foam board or spray foam recommended
Types of Insulation
| Type | Description | Best For |
|---|---|---|
| Fibreglass Batts | Affordable, easy to install | DIY interior walls |
| Rigid Foam Board | High R-value per inch, moisture-resistant | Floors and ceilings |
| Closed-Cell Spray Foam | Air-sealing, superior insulation & vapor barrier | Full envelope solutions |
Note: Spray foam insulation often eliminates the need for a separate vapor barrier.
Drywall & Finishing Materials
Drywall Options:
- Use moisture-resistant green board or mold-resistant purple board
- Standard drywall is also acceptable, provided the room has been built properly and no risk of warm air, carrying overt amounts of humidity, ispresent.
Sealing & Painting:
- Use mold/mildew-resistant paint on all interior surfaces
- Caulk gaps around outlets, lights, and vents
- Choose finishes that can handle occasional condensation
Door & Window Considerations
Every potential air leak impacts your cooling system’s performance. Pay special attention to:
Cellar Doors:
- Solid core or insulated exterior-grade doors
- Full weather stripping on all sides
- Magnetic or compression door sweeps
Windows (if used):
- Double- or triple-pane insulated glass
- UV-filtering coating
- Airtight frames with thermal breaks
Contractor Tips & Mistakes to Avoid
Best Practices:
- Confirm vapor barrier is correctly placed before insulation
- Always insulate every surface: walls, ceiling, and floor
- Test all HVAC penetrations and lighting fixtures for air tightness
- Include access panels for cooling unit maintenance
Common Errors:
- Reversing vapor barrier placement (causes condensation)
- Under-insulating ceilings or shared walls
- Failing to ventilate the unit’s exhaust room properly
- Using porous flooring or carpet
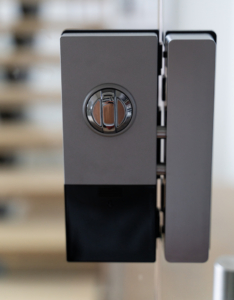
- Large gaps around glass doors
Built for Performance—and Longevity

A wine cellar built with attention to detail will last for decades and maintain ideal conditions with minimal intervention. Whether you’re constructing from scratch or renovating an existing space, Wine Cooling Pro can connect you with the tools, systems, and experts you need to build it right the first time.
Need help choosing insulation materials or verifying your build plan?
Our cellar design specialists are available to review blueprints, insulation specs, and cooling load requirements to ensure your wine room performs exactly as intended.
Image credits: Paul Grdina Photography